Brake pedal mod and clutch cover replacement
In my opinion most bikes come with a fundamental design flaw to the brake pedal. Either that or I have a bad habit of cutting it too close around rocks. With the KTM 300 I thought I was finally safe due to the expansion chamber hanging in front of the brake lever, but don’t worry… I still found a way to do what has become my signature move, and also the reason I carry quick steel with me at all times (which you should all do but that’s another conversation).
If you have punched your brake pedal through your clutch cover than you have come to the right place, and if not you can still use Part 2 of this how to to make sure you don’t.
Part 1 – Replacing your clutch cover
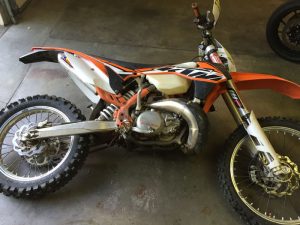
This is done on a 2014 KTM XCW but most of this will apply to all bikes. If you have broken your cover i’d recommend draining your oil totally out so you can flush out and pieces that may have broken off from inside the cover. Even if your cover is just dented or cracked you should assume there are pieces inside (think about the backside of a piece of wood that has been shot). If you are simply replacing your cover because you had to have that new billet orange one than you can just lay the bike on its left side and leave the oil in.
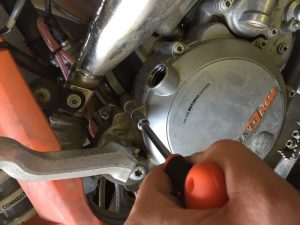
On this bike the brake pedal return spring is connected to the cover so you have an additional step of removing the spring. This was made easy by adjusting the reach adjustment all the way loose to relieve spring tension. This also made it easier to move the lever out of the way. On some bikes you may have to fully remove the brake lever.
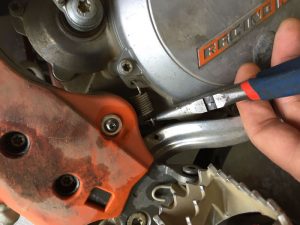
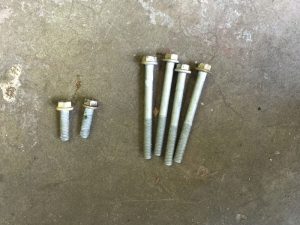
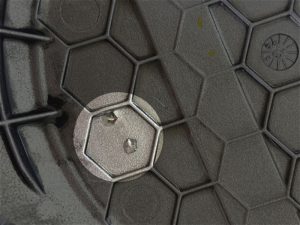
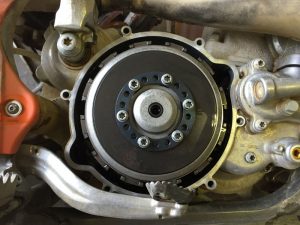
Next remove all the bolts holding on the clutch cover. Often the bolds are different lengths so pay attention to where they came from. If you are changing the cover due to an impact then inspect the inside of the cover to make sure there are no missing pieces of metal. If there are make sure you find them before continuing. You need to be 100% sure that they are not inside the clutch area! You can see on this bike there was a broken piece that broke off with my finger when I pushed on it
If the cover you are replacing had a paper gasket make sure there are no pieces stuck to the surface. If they are really stuck on you can carefully scrape them off with a razor blade. With this bike the cover has an o-ring so I only had to make sure the gasket surface was clean and free of debris.
Carefully place the new gasket on the case (if you have an oring make sure it is well seated in the cover and will not get pinched).
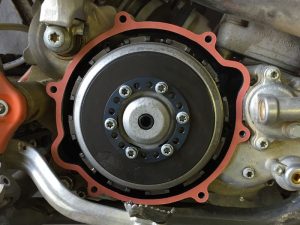
Carefully place the cover onto the gasket making sure nothing moves or shifts. Drop the bolts into the holes to help keep it all lined up.
Then tighten the bolts a little at a time in a criss cross pattern (like lugnuts) to the recommended torque spec. If you drained the oil replace it with the correct amount then start the bike and check for leaks.
Part 2 – Modifying your brake pedal to protect your clutch cover
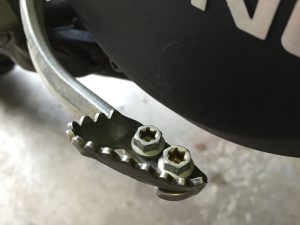
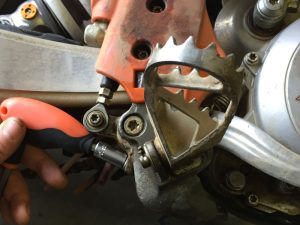
The design flaw I mentioned earlier is the fact that the brake pedal has teeth on the inner edge. When a rock or some other fixed object hits the lever it flexes into the case and dents or punches a hole. The fix for this is to buy a new fancy aftermarket brake pedal, or just be cheap and modify the stock one.
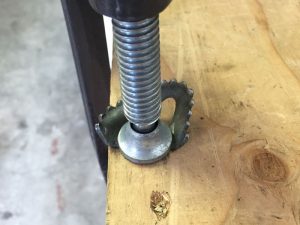
On this bike the end of the pedal could be unbolted which made this a really easy job, but on most bikes you will have to remove the brake lever. Some bikes also have a cotter pin in the brake pedal bolt so make sure that is out before removing the bolt. Make sure you mark where the lever was height wise so you can get it back to the correct height when you are done. You could try and modify it while it is still on the bike, but if you do do it before replacing the clutch cover in case you make a mistake and hit the cover.
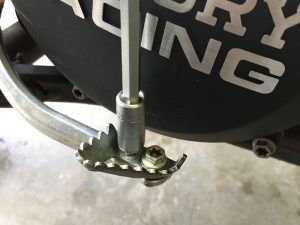
I clamped the pedal to a workbench with a c-clamp but a vice would have been better. Then I took a dremel and cut off the inner teeth at an angle that made it as “soft” as possible. I also ground it down to make it look a bit nicer.